Unlocking the Full Potential of Your Sewing Machine: The Right Foot for the Right Stitch
Sewing, at its core, is an art. While it’s true that the hands that guide the fabric and the mind that envisions the design play critical roles, the sewing machine is the unsung hero of this creative process. And at the heart of this intricate machine lies an often-underestimated component: the sewing machine foot.
The Foot: Not Just an Afterthought
As a seasoned technician who’s had the privilege of diving deep into the mechanisms of countless sewing machines, I can’t emphasize enough the role of the foot in ensuring the perfect stitch. Many budding sewing enthusiasts, and even some seasoned ones, mistakenly believe that as long as the needle is sharp and the machine is functioning, they’re good to go. But, much like how a painter selects brushes or a chef picks the right knife, a seamstress or tailor needs to select the proper sewing machine foot for the task at hand.
Each sewing project brings with it unique requirements – the type of fabric, the stitch style, and even the design’s intricacy can dictate which foot is best suited for the job. Just like you wouldn’t use a steak knife to slice bread, you wouldn’t use a quilting foot for delicate embroidery work.
The Versatility of the Machine Foot
The marvel of engineering that is the sewing machine foot is what grants your machine its versatility. Picture this: you’ve just started a project on silk, a notoriously slippery fabric. Now, using the standard foot might get the job done, but you’d likely find yourself constantly wrestling with the material, leading to uneven stitches or, worse, damage to the fabric. Switch over to a walking foot or a Teflon foot, however, and it’s smooth sailing.
Or consider intricate embroidery, where precision is key. The open-toe foot provides a clear view, allowing for exact placement, ensuring that every swirl and twirl of your design is just as you envisioned it.
A World of Options at Your Fingertips
While it’s easy to be overwhelmed with the vast array of feet options available, the beauty lies in the specificity they bring. From the Blind Hem Foot designed to give you those invisible seams to the Zig-Zag Foot that’s every quilter’s dream, the choices available mean that there’s a foot for virtually every sewing endeavor.
And let’s not forget about the projects that require a touch of finesse. Beading, for instance, is a delicate task, and the Beading Foot is tailor-made for it, ensuring that each bead is sewn in place without a hitch.
Investing Time to Reap the Benefits
For those just starting their sewing journey, my advice is simple: take the time to familiarize yourself with the various feet at your disposal. This knowledge is as crucial as understanding the machine’s basic functions. Not only does it ensure the longevity of your machine, but it also elevates the quality of your work.
In the upcoming sections, we’ll delve deeper into each specific foot type, its unique features, and the best scenarios to use them in. As we journey together through the world of sewing feet, remember that each foot, no matter how niche or specialized, has a role to play in turning your sewing dreams into reality.
The Foundation: Basic Standard Presser Foot
Description:
The Basic Standard Presser Foot, often simply referred to as the standard foot, is aptly named as it comes standard with almost every sewing machine out there. Think of it as the jack-of-all-trades in the sewing foot realm. Characterized by its flat bottom and straight stitch hole, this foot is designed to offer a firm grip on fabrics, ensuring that they’re fed evenly under the needle. It provides a balanced pressure, allowing for a consistent stitch quality. Its transparent or semi-transparent design usually offers a clear view of the needle, making it easier to guide your fabric accurately.
From my early days as a technician, I’ve marveled at the sheer versatility this foot brings to the table. While it might lack the specialization some of its counterparts boast, its broad application range cannot be underestimated.
Common Uses:
Straight Stitching: The primary function and most common use of the Basic Standard Presser Foot is for straight stitching. Whether you’re hemming a garment, joining two pieces of fabric, or working on quilt piecing, this foot ensures you get a neat, straight line every time.
- Zigzag Stitching: While there’s a dedicated Zig-Zag foot available, the standard presser foot is designed to accommodate a zigzag stitch as well. It’s especially handy for finishing edges to prevent them from fraying.
- Decorative Stitches: If your sewing machine comes with a range of decorative stitches, the standard foot can handle many of them with ease. From scallops to the basic leaf design, this foot lets your creativity flow.
- Basting: For those moments when you need a temporary stitch to hold fabrics in place, the standard foot is up to the task. Its design allows for easy removal of basting stitches once they’ve served their purpose.
- Sewing Seams: Be it apparel, home decor, or crafts, the Basic Standard Presser Foot is the go-to for sewing seams. Its ability to handle various fabric types, from lightweight chiffons to medium-weight cotton, makes it a staple in any sewing kit.
- Layered or Lined Projects: When dealing with layered projects like quilts or lined garments, the standard foot can handle the additional bulk, ensuring an even stitch throughout.
Having the Basic Standard Presser Foot is akin to a carpenter owning a hammer or a chef wielding a knife. While there are myriad specialized tools available, there’s no discounting the value of a trusty all-rounder. As we delve deeper into the vast world of sewing feet, keep in mind that while specialization has its merits, versatility is invaluable. The standard foot’s widespread applicability makes it not just foundational but indispensable for anyone passionate about sewing.
Adorning with Precision: Decorative Feet
Craftsmanship Meets Creativity
a. Beading Foot
Crafting Delicate Elegance
Description:
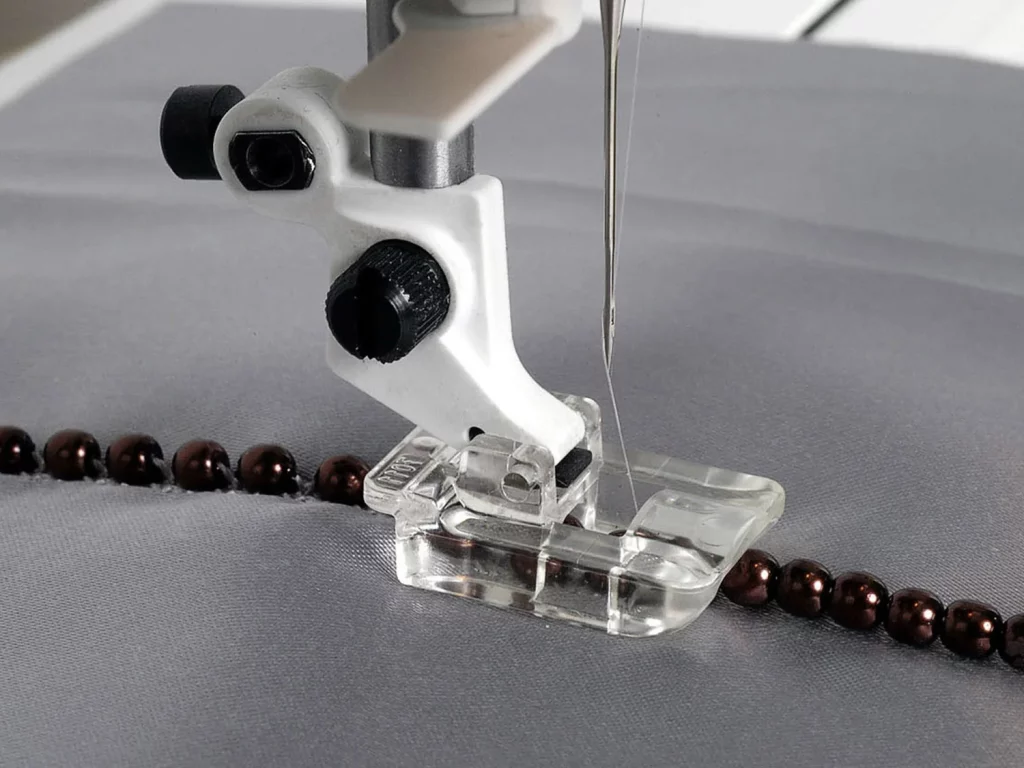
The Beading Foot is a graceful tool tailored for sewists aiming to add intricate beadwork to their creations. Featuring a deep groove underneath, it effortlessly accommodates strung beads, allowing them to pass beneath without obstruction. The sides of the foot provide a guide, ensuring that beads are securely and uniformly attached to the fabric.
Uses and Tips:
- Beading on Edges: Great for adding that final touch to edges of garments, especially gowns or decorative scarfs.
- Decorative Patterns: Beyond just edging, create ornate patterns or motifs in the body of a fabric piece.
- Tip: Always test on a fabric scrap first to ensure bead size compatibility and stitch settings.
b. Ribbon Foot
Seamless Integration of Grace
Description:
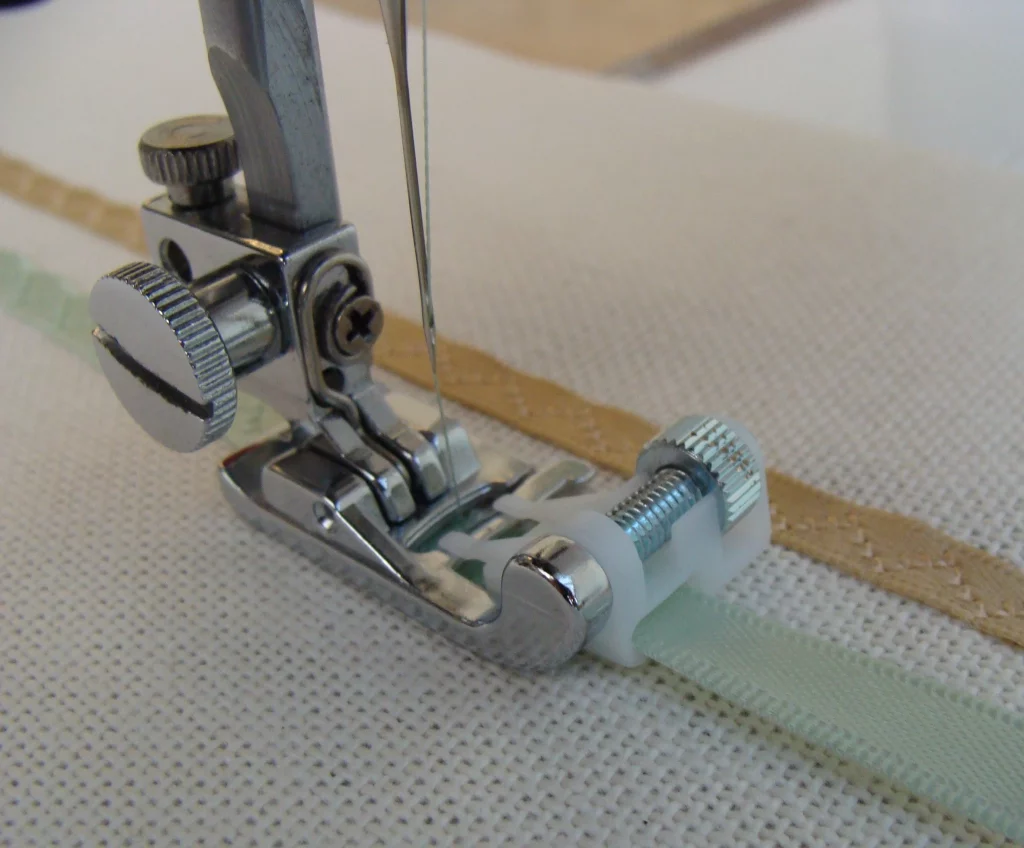
The Ribbon Foot is adeptly designed to guide ribbons, tapes, or even lace through it, allowing for immaculate stitching onto the project. With a wide opening to accommodate varying ribbon widths, it ensures the ribbon remains flat and undistorted during the stitching process.
Uses and Tips:
- Decorative Ribbon Inserts: Perfect for integrating ribbons into pillowcases, quilts, or dresses.
- Surface Embellishment: Stitch ribbons in patterns or grids for a unique texture.
- Tip: Choose a thread that matches or contrasts with your ribbon, depending on the desired effect.
c. Fringe Foot

For that Flair of Drama
Description:
The Fringe Foot, with its peculiar barrier in the middle, is a magician when it comes to creating stand-up fringes, loops, and even traditional fagoting. As the barrier ensures equal spacing, the result is a neat, consistent finish every time.
Uses and Tips:
- Fringe Accents: Ideal for edging curtains, cushions, or apparel.
- Loops for Buttonholes: Craft decorative loops suitable for ornamental closures.
- Tip: Adjust stitch width and length to experiment with the fringe’s final appearance.
d. Monogramming Foot
Signature Touches in Stitches
Description:
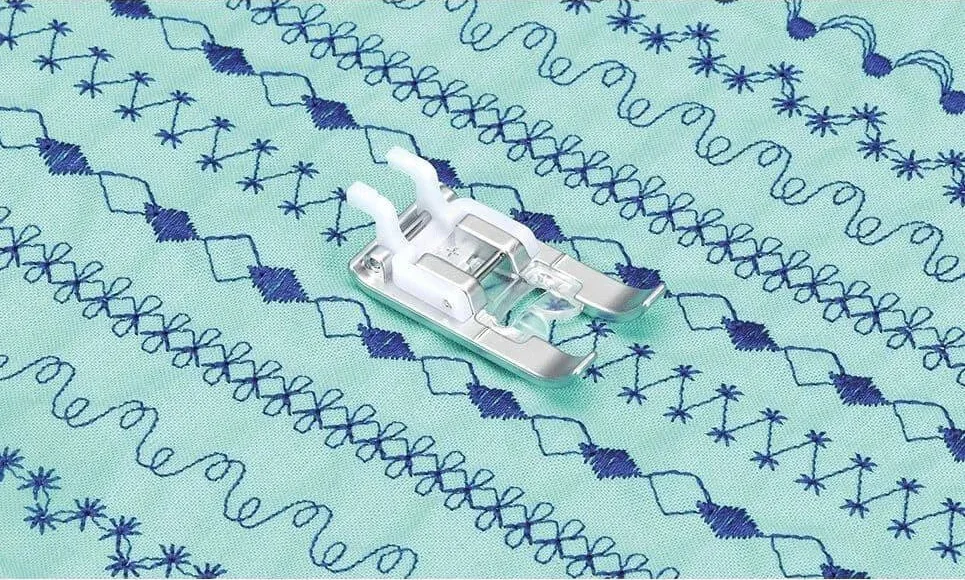
An invaluable tool for embroiderers, the Monogramming Foot boasts a clear construction, offering an unobstructed view of the stitching area. It provides a stable platform, ensuring even, consistent embroidery, particularly with dense patterns.
Uses and Techniques:
- Personalization: Perfect for adding names, initials, or small logos.
- Embroidered Motifs: Create standout designs on clothes, linens, or accessories.
- Technique: Slow and steady is key. Moving too fast can distort detailed embroidery designs.
e. Satin Stitch Foot
Lustrous Stitches, Flawless Finish
Description:
Elegantly designed, the Satin Stitch Foot, also known as the “Open Toe Foot,” is characterized by its open front, granting an uninhibited view of the stitching. The underside is beveled, accommodating dense stitches without the foot getting stuck.
Ideal Projects for its Use:
- Appliqué Designs: Attach ornate patterns or motifs with precision.
- Decorative Borders: Craft detailed edges on quilts, clothes, or home decor.
- Satin Stitch Fill: Ideal for areas that need solid color fills using closely spaced zigzag stitches.
Working with decorative feet opens up an expansive world of detailed craftsmanship. While each foot in itself brings a unique capability to the sewing table, the secret lies in knowing when and how to use them. By harnessing the power of these specialized feet, even the most ordinary fabric can be transformed into a piece of art.
Specialized for Finishings and Closures
The Unsung Heroes Behind Flawless Endings
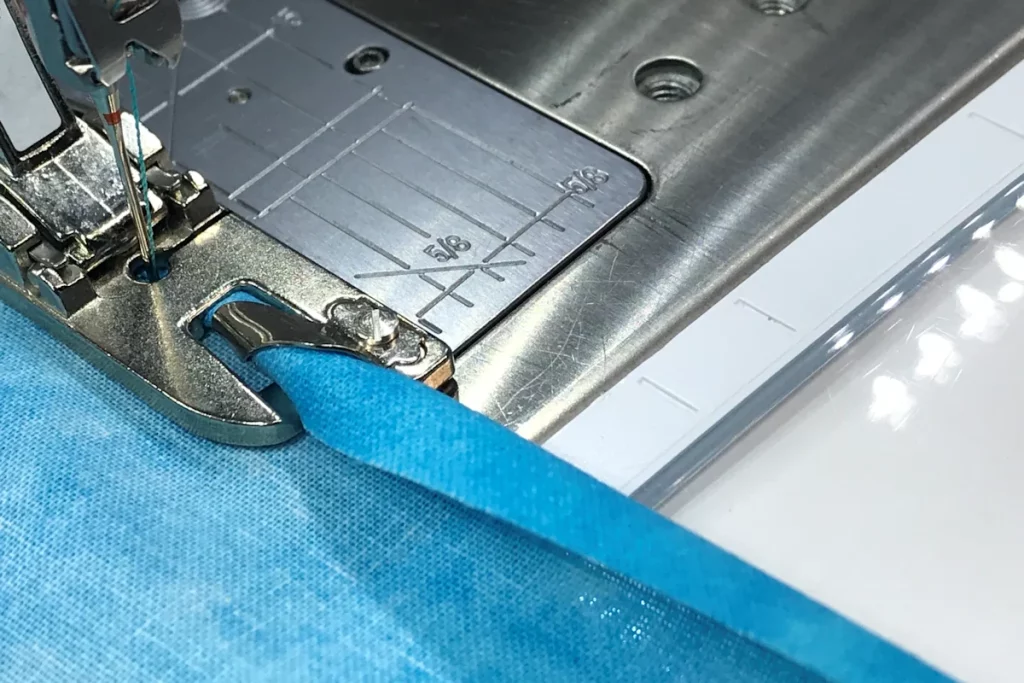
a. Blind Hem Foot
Crafting Invisible Seamlines
Description:
The Blind Hem Foot stands out with its adjustable guide, primarily designed to assist in sewing nearly invisible hems. It aligns the fabric in such a way that the machine catches only a tiny portion of it during stitching, ensuring the hem remains concealed on the right side.
Step-by-step guide:
- Prepare the Fabric: Start by folding your fabric to the desired hem width. Then, fold it back on itself, leaving a small edge of the hem exposed.
- Attach the Foot: Position the Blind Hem Foot on the sewing machine.
- Position the Fabric: The folded edge should run against the foot’s guide, with the exposed hem edge to the right.
- Adjust Stitch Settings: Set the machine to a blind hem stitch.
- Begin Sewing: Stitch slowly, ensuring the needle catches just a sliver of the exposed hem edge with each swing to the right.
- Finish & Check: Unfold the fabric, and marvel at the near-invisible hem!
b. Button Fitting Foot
Anchoring Buttons with Precision
Description:
The Button Fitting Foot is crafted with a singular goal: sewing buttons in place swiftly and efficiently. Its design holds the button securely while the machine stitches it in place, eliminating tedious hand sewing.
How to’s:
- Position the Button: Place the button on the fabric where it needs to be attached.
- Align the Foot: Attach the Button Fitting Foot, ensuring the button sits beneath it.
- Select Stitch: Opt for the zigzag stitch and ensure the stitch width aligns with the button’s holes.
- Stitch in Place: Lower the foot and stitch the button, moving back and forth a few times for each set of holes.
- Secure & Cut: Lift the foot, snip threads, and ensure the button is firmly attached.
c. Invisible Zipper Foot

A Seamless Closure Experience
Description:
Crafted for precision, the Invisible Zipper Foot is the go-to tool when you wish to install zippers that blend seamlessly into your projects. Its unique groove underneath facilitates the coils of the zipper to pass through, allowing for closer stitching.
Technique and Tips:
- Prepare the Zipper: Unzip and press the zipper coils flat.
- Position Zipper: Lay the zipper face down on the right side of the fabric, aligning the zipper coil with the seam allowance.
- Attach & Sew: With the Invisible Zipper Foot attached, stitch the zipper in place, guiding the zipper coils into the foot’s groove.
- Tip: Always start sewing from the zipper’s bottom to avoid any discrepancies in alignment.
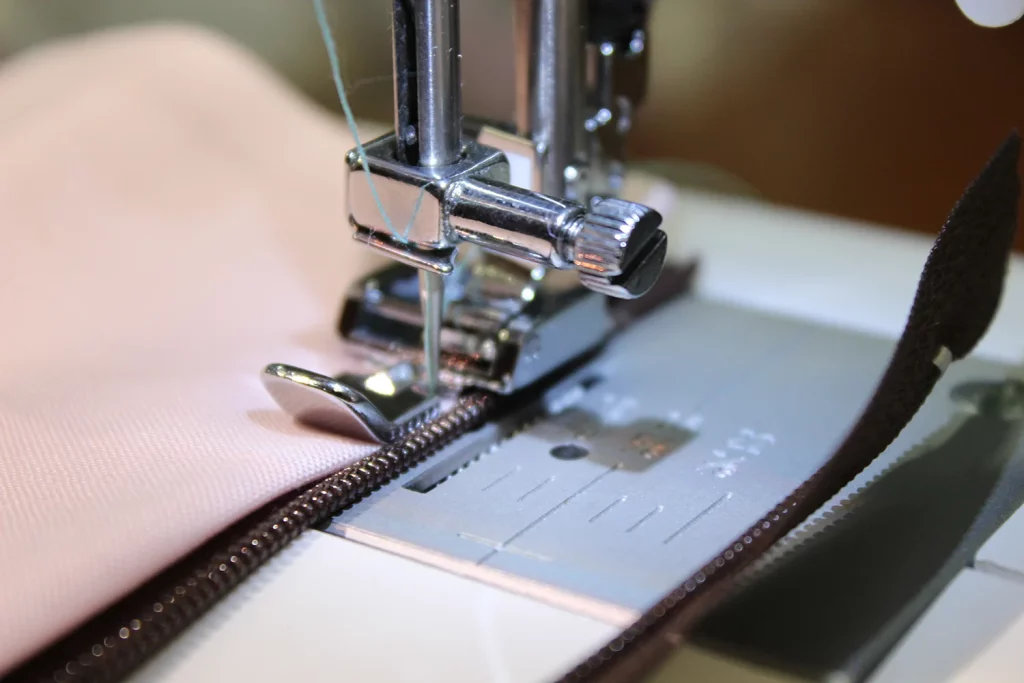
d. Zipper Foot
The Classic, Versatile Zipper Ally
Description:
The Zipper Foot, adjustable and slender, is the traditional tool for attaching zippers. Unlike its invisible counterpart, this foot is designed for those zippers which are meant to be seen and can be adjusted to either side of the needle.
Usage Recommendations:
- Prep the Area: Ensure the area where you’ll insert the zipper is either basted shut or marked clearly.
- Position the Zipper: Place the zipper face down onto the right side of the fabric.
- Attach the Foot: Position the Zipper Foot so the needle is on the far side of the zipper coils.
- Sew in Place: Stitch along the zipper’s length, maintaining a straight line and consistent distance from the coils.
- Switch Sides: For the other side of the zipper, move the Zipper Foot to the opposite side and repeat.
Attaching finishes and closures to a sewing project may seem daunting, but with the right feet and techniques, the process is simplified. These tools not only ensure a polished outcome but also add durability to the project, ensuring longevity and quality.
Crafting with Details: Specialty Feet
Taking Sewing Projects to the Pinnacle of Perfection
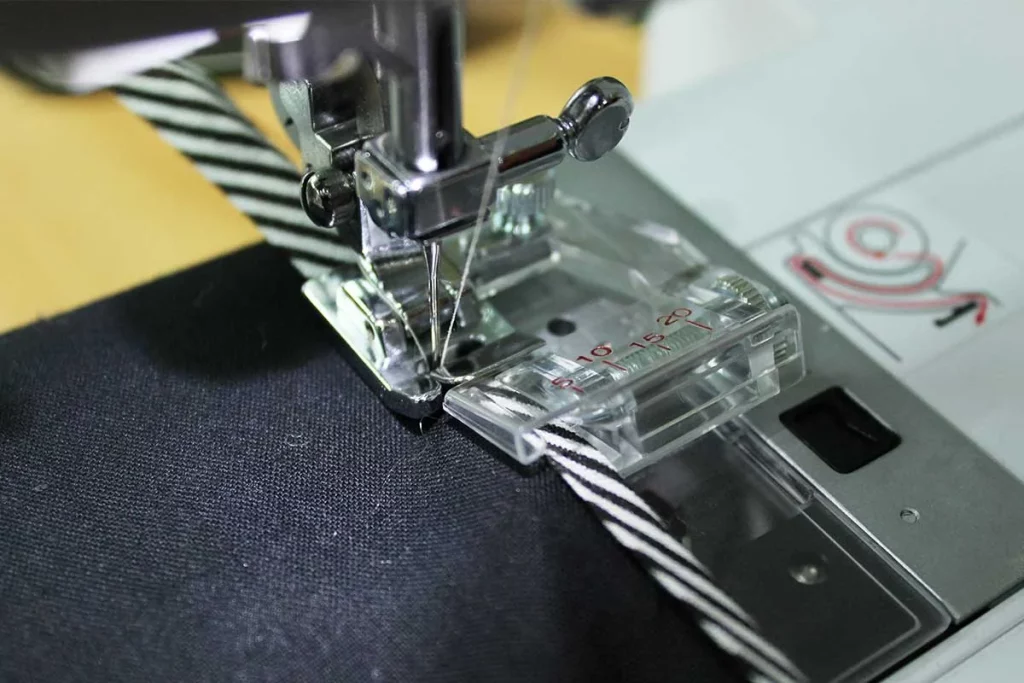
a. Binder Foot
Mastering the Art of Edge Finishing
Description:
The Binder Foot is specifically designed to assist in applying pre-folded bias binding tape or bias tape you’ve made yourself to the edge of fabric in one easy step. Characterized by its unique scroll-like design, it holds and guides the binding, making it effortless to achieve a neat and even finish.
Projects to Use With:
- Quilt Edging: Achieve a professional finish on your quilts, ensuring longevity and a polished look.
- Apparel: Perfect for necklines, armholes, and more to give garments a clean, refined edge.
- Home Decor: Ideal for placemats, table runners, and decorative linens, giving them a touch of elegance.
b. Cording Foot / Piping Foot

Accentuating Outlines with Precision
Description:
A dual-purpose marvel, the Cording Foot (often synonymous with the Piping Foot) is built to accommodate cords or decorative threads, guiding them beneath the needle as you sew. Its structured tunnel design ensures even and precise stitches over the cord or piping, giving projects a raised, dimensional feel.
Applications:
- Upholstery & Home Decor: Ideal for adding piping to cushions, pillows, and slipcovers.
- Garments: Enhance necklines, cuffs, and seams, giving them a distinct outline.
- Crafts: From purses to decorative fabric baskets, add a touch of sophistication with piped edges.
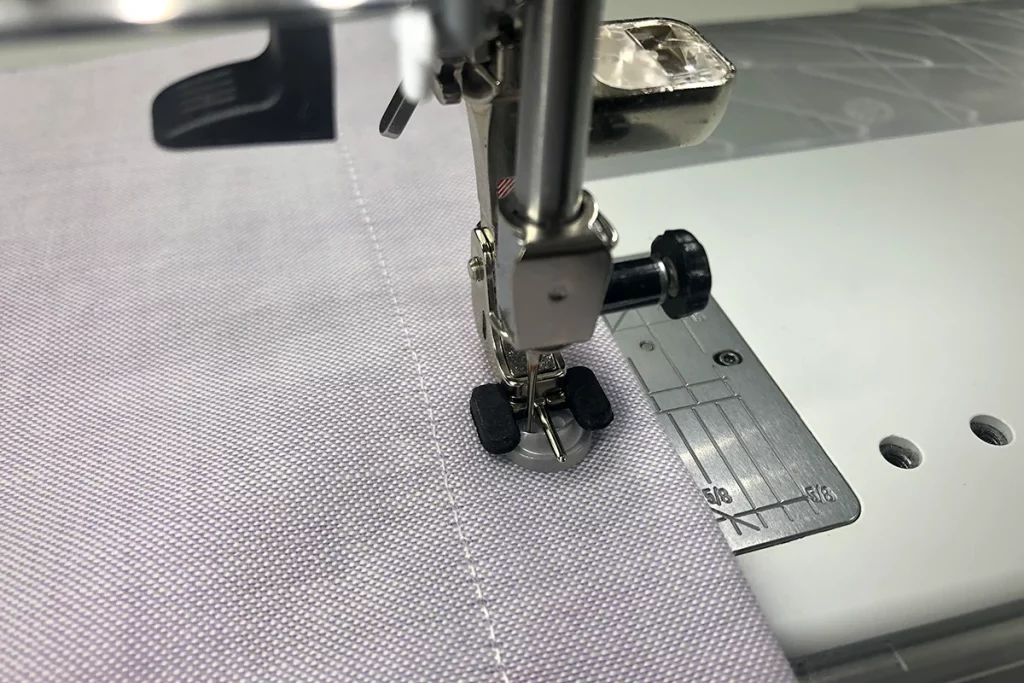
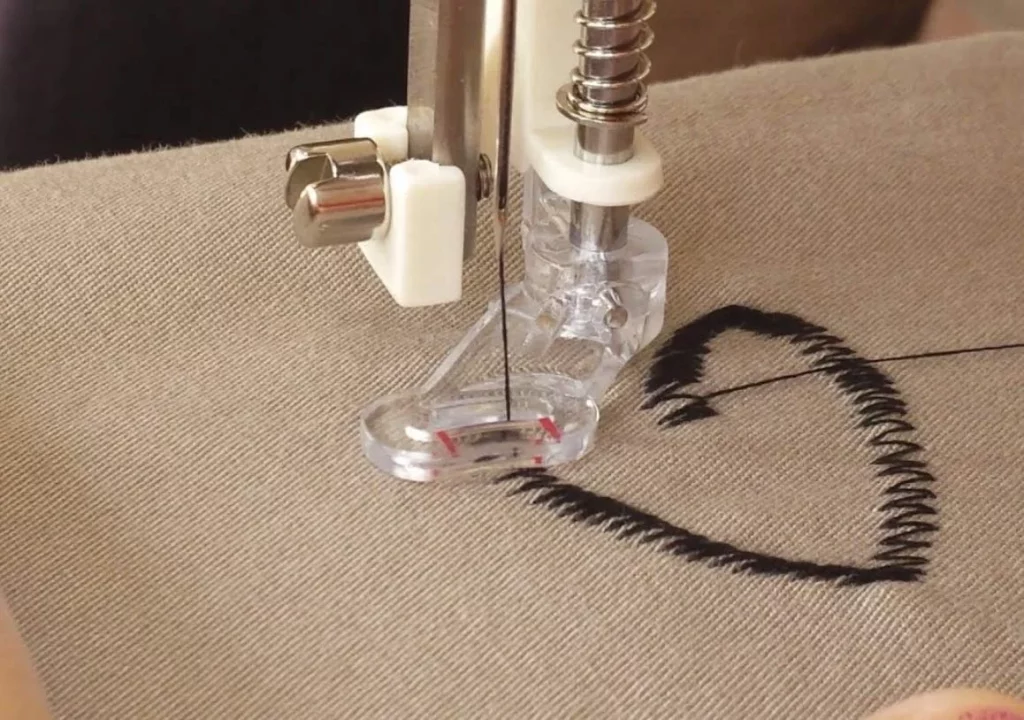
c. Darning Foot / Embroidery Foot / Free Motion Foot
Unhindered Creativity at Your Fingertips
Description:
Often interchangeable in name but consistent in function, this foot is a gem for freehand sewing. The Darning Foot, with its open circle design, offers a clear view of your work, allowing for unrestricted movement in all directions. It’s the key to free-motion quilting, embroidery, and darning.
Tips for Seamless Embroidery:
- Stabilize: Always use a stabilizer beneath your fabric for even, puckering-free designs.
- Plan Ahead: Mark your design lightly with a fabric pen or chalk for guidance.
- Hand-Guided Movement: Keep a steady hand, moving the fabric consistently under the needle, ensuring even stitch length.
- Practice First: Before committing to your main project, try the design on a scrap piece of fabric to get the feel.
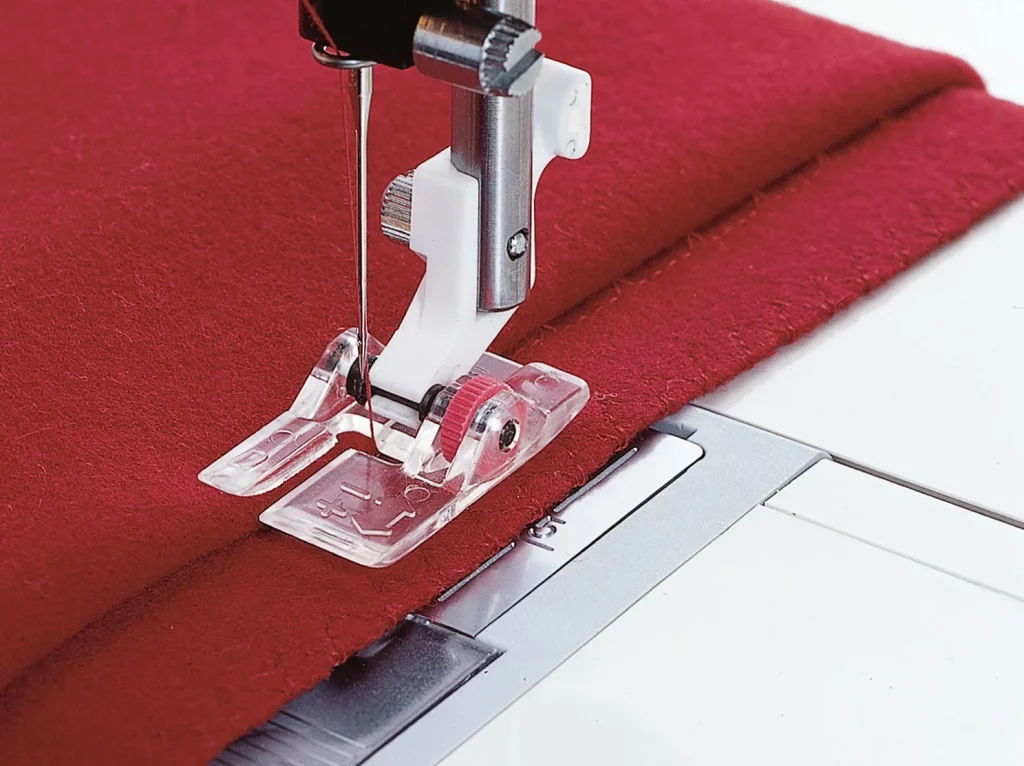
d. Edge Stitch Foot
Perfection Along the Borders
Description:
The Edge Stitch Foot, distinguished by its guide in the center, ensures stitches run perfectly parallel to edges, folds, or seams. It eliminates the guesswork and offers uniform, straight, and close stitching, making it indispensable for detailed work.
Benefits:
- Precision: Ensures an even distance from the edge, eliminating uneven or wavy stitches.
- Versatility: Ideal for hemming, topstitching, and joining lace or fabric edges.
- Time-Saver: Speeds up projects by providing consistent results without constant adjustments.
- Enhanced Durability: Creates strong and neat seams, adding to the longevity of the final product.
Intricate details in sewing are often what set a project apart, elevating it from good to outstanding. With the right specialty feet at your disposal, you can confidently tackle detailed work, ensuring that your finished product is not just well-crafted, but also exudes artistry and professionalism.
Working with Fabrics: Texture and Material Feet
The Game Changers in Fabric Specialization
a. Knit Foot
Handling the Stretch with Grace
Description:
The Knit Foot is a specialized tool designed to provide optimal sewing results when working with stretchy and knit fabrics. With its unique shape and design, the Knit Foot ensures that the fabric is fed into the sewing machine evenly without overstretching, preventing wavy seams and skipped stitches, which are common challenges when sewing knits.
Best Practices:
Stabilize: Before sewing, stabilize the knit fabric using interfacing or stabilizer, especially for areas that require precision, such as hems or necklines.
Use the Right Needle: Pair the Knit Foot with a ballpoint or jersey needle to avoid damaging the fabric and ensuring smooth stitching.
Go Slow: Sewing knits can be tricky. Maintaining a slow, consistent speed ensures you have more control and prevents unwanted mistakes.
Seam Allowances: Keep generous seam allowances to make adjustments if necessary and to avoid overstretching at the seams.
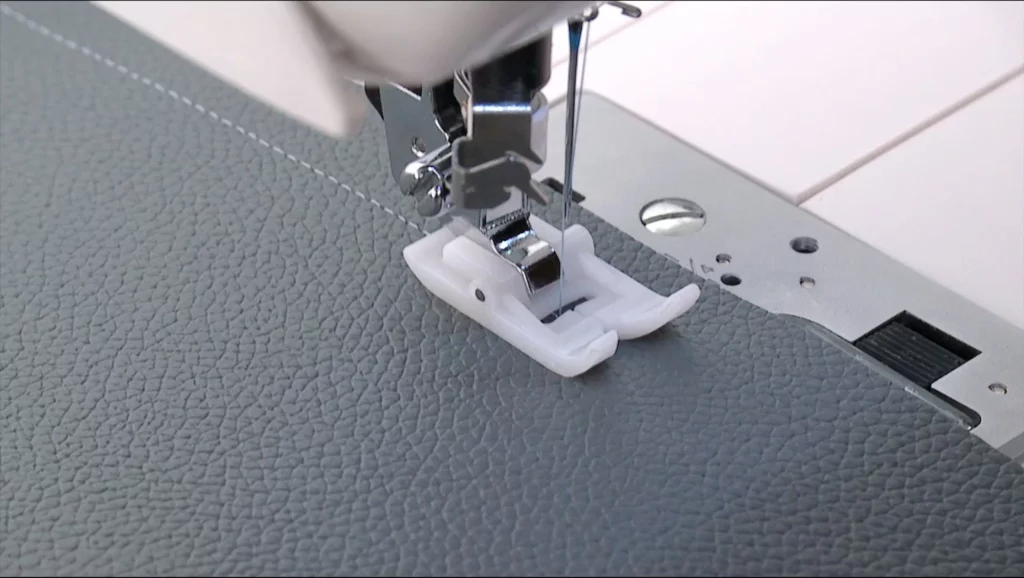
b. Non-Stick Foot & Teflon Presser Foot (Non-Stick Foot)
Gliding Over Tricky Terrains
Description:
Both the Non-Stick Foot and the Teflon Presser Foot are designed with a special coating to deal with fabrics that have a tendency to stick to regular feet, such as leather, vinyl, or oilcloth. The unique, slick surface of these feet ensures a smooth, uninterrupted flow of fabric beneath the needle, eliminating the typical drag or resistance that these fabrics often present. Though they may go by different names, their function remains focused on ease and precision.
Why and When to Use:
Tackle Sticky Fabrics: Ideal for sewing materials like faux leather, vinyl, laminated fabrics, or any surface where a typical foot might “stick” or “drag.”
Maintain Stitch Integrity: When working with these materials, maintaining consistent stitch length is crucial. The non-stick feature ensures the fabric feeds evenly, preserving stitch consistency.
Avoid Damage: Using the correct foot prevents potential damage or impressions on delicate or impressionable fabrics.
Versatility: Apart from “sticky” fabrics, the non-stick foot is also great for very fine fabrics that might otherwise be marred by a regular foot.
The fabric you choose can often define the project. Whether it’s a slinky evening dress in a soft knit or a bespoke faux leather handbag, the material sets the tone. By pairing these fabrics with their corresponding specialized feet, you not only ensure the integrity and quality of your sewing but also embrace the true essence of the material. In sewing, as in life, it’s often these minute attentions to detail that elevate the ordinary to extraordinary.
Quilting Wonders: Feet for Quilters
Mastering the Art of Quilting with the Right Tools
a. Quarter Inch Foot

Achieving Perfection, One Stitch at a Time
Description:
The Quarter Inch Foot, as its name suggests, is tailor-made for quilters who require that precise 1/4 inch seam allowance, a golden standard in the world of quilting. Specifically designed with a guide on the side, it ensures uniform seam allowances, which are critical in quilt piecing to ensure corners and patterns align perfectly. This foot takes the guesswork out of your sewing, leading to precision every time.
Tips for Precision:
- Consistent Pressure: Ensure even pressure is applied while feeding the fabric. This guarantees that the fabric edges align with the foot guide consistently.
- Stitch Test: Before diving into your main project, test your stitches on a scrap piece of fabric to ensure the precision of the quarter-inch seam.
- Fabric Alignment: Always keep your fabric edges smoothly aligned with the guide on the side of the foot for flawless seams.
b. Quilting Foot
Artistry with Every Layer
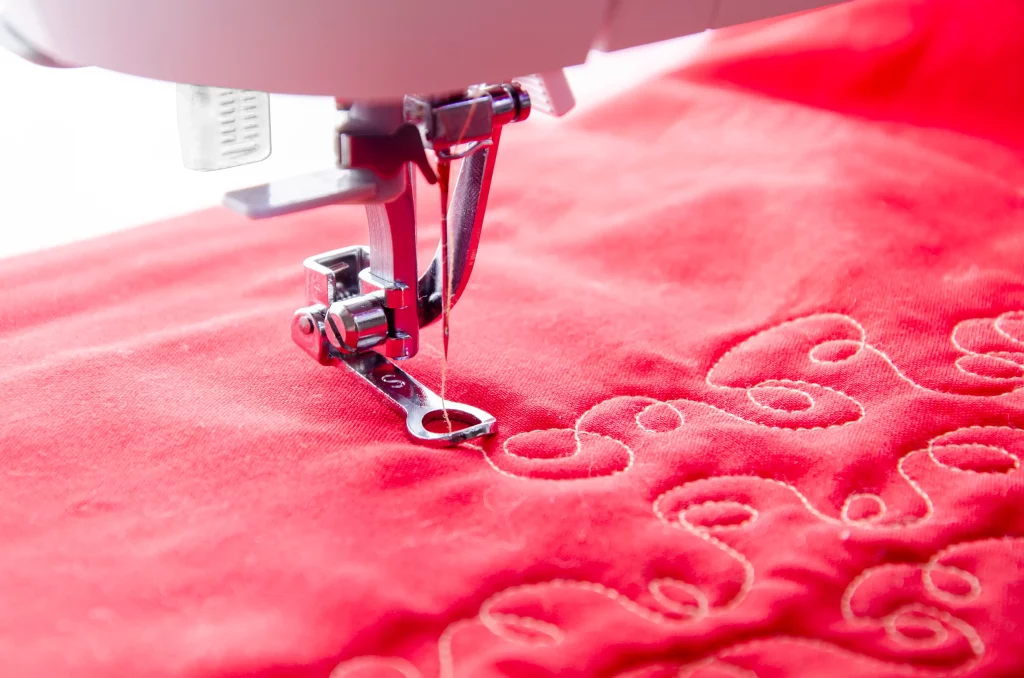
Description:
The Quilting Foot, often referred to as a darning or free-motion foot, is an innovative tool that lets the fabric move freely in any direction under the needle. This enables the user to create stunning, free-hand embroidery designs, stippling, and other intricate patterns on quilts. Its design allows for a clear view of the work area, ensuring precision while maneuvering.
Techniques:
- Stippling: A classic quilting method where you sew a continuous, curvy line that never overlaps, creating a mesmerizing pattern on the quilt.
- Echo Quilting: This involves creating patterns by echoing or replicating a design multiple times, gradually moving outward.
- Thread Painting: By using the Quilting Foot, one can “paint” designs on a quilt using colorful threads, adding depth and texture to the artwork.
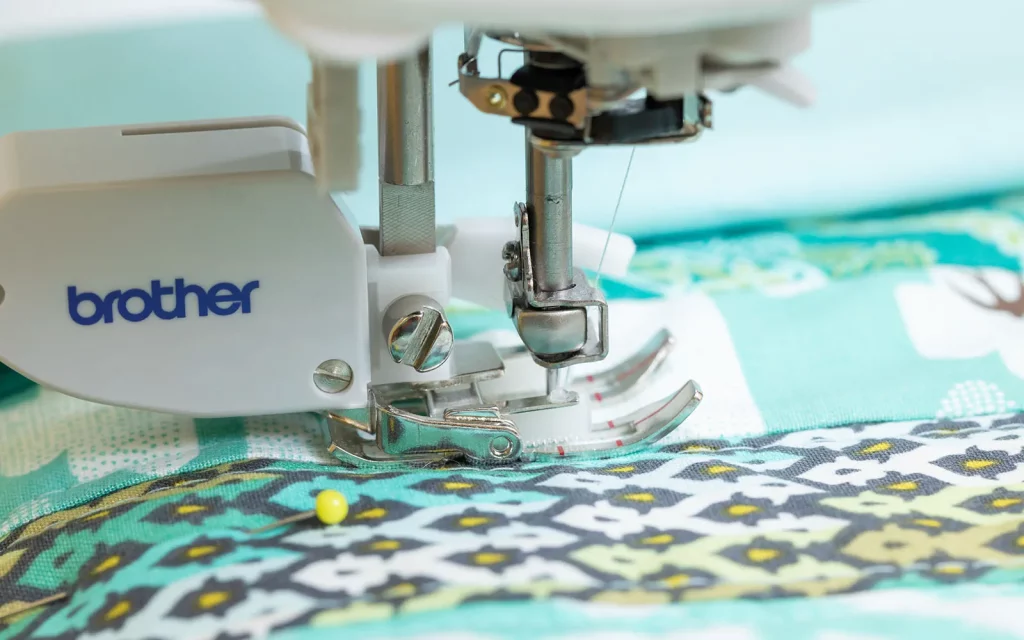
c. Walking Foot
Ensuring Harmony Amongst Layers
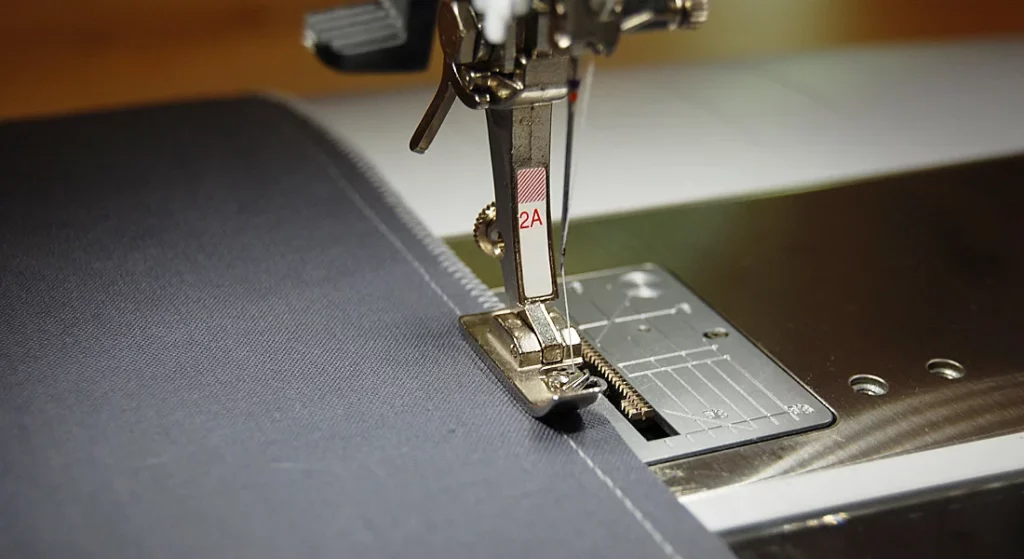
Description:
A Walking Foot is the unsung hero of the quilting world. Designed to evenly feed multiple layers of fabric through the sewing machine without shifting, it’s especially beneficial when you’re working with quilts, ensuring the top, batting, and backing remain aligned. Its unique set of feed dogs work in tandem with the machine’s own feed dogs, allowing all layers to progress through the machine simultaneously.
Best Practices and its Advantages:
- Layer Alignment: Pin or baste your quilt layers thoroughly before sewing to help the Walking Foot do its job efficiently.
- Straight-Line Quilting: The Walking Foot is excellent for straight line quilting, including stitching in the ditch, where you sew directly in the seams of the quilt blocks.
- Avoid Backstitching: When starting or finishing a seam, reduce stitch length instead of backstitching to prevent bunching.
Advantages:
- Prevents Fabric Shifting: It ensures the quilt layers stay aligned, eliminating the problem of a misaligned or puckered finish.
- Versatility: Besides quilting, the Walking Foot is also ideal for matching plaids or stripes and sewing fabrics of different textures.
- Improved Stitch Quality: Offers even, high-quality stitches, especially on thick or textured fabrics.
Quilting is an art form that transforms fabric and thread into masterpieces. By selecting the ideal foot for each quilting task, artisans ensure their creations not only look exquisite but are constructed with the highest quality and precision.
Precision and Specialty Stitching
Unleashing the Power of Specificity in Sewing
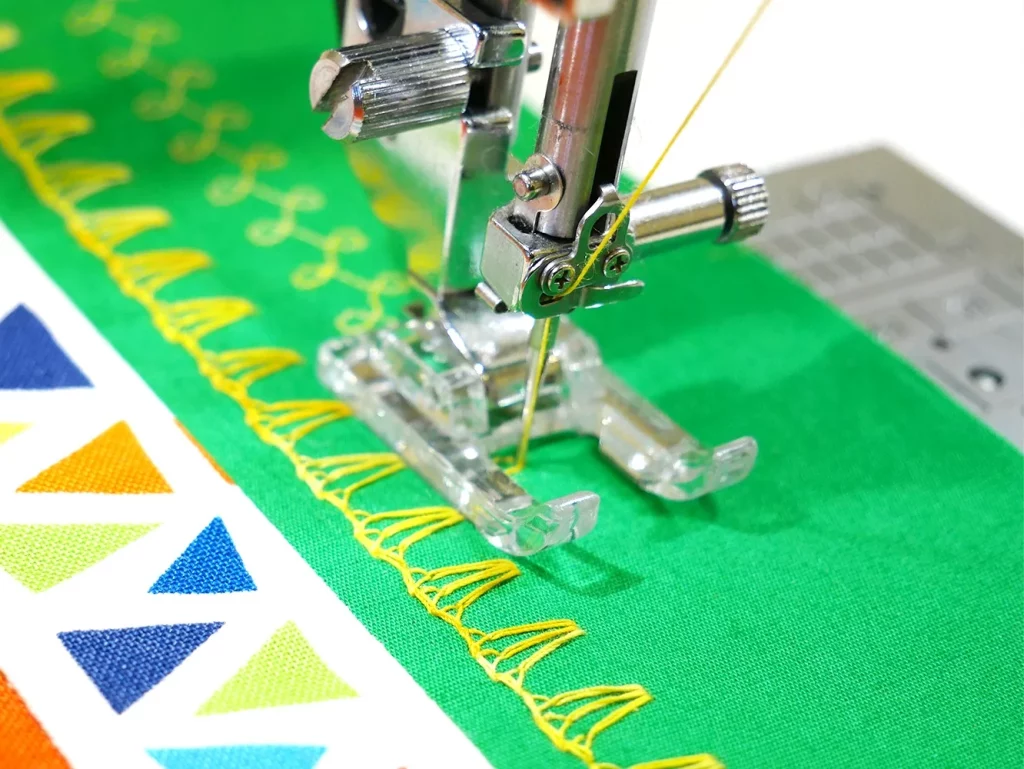
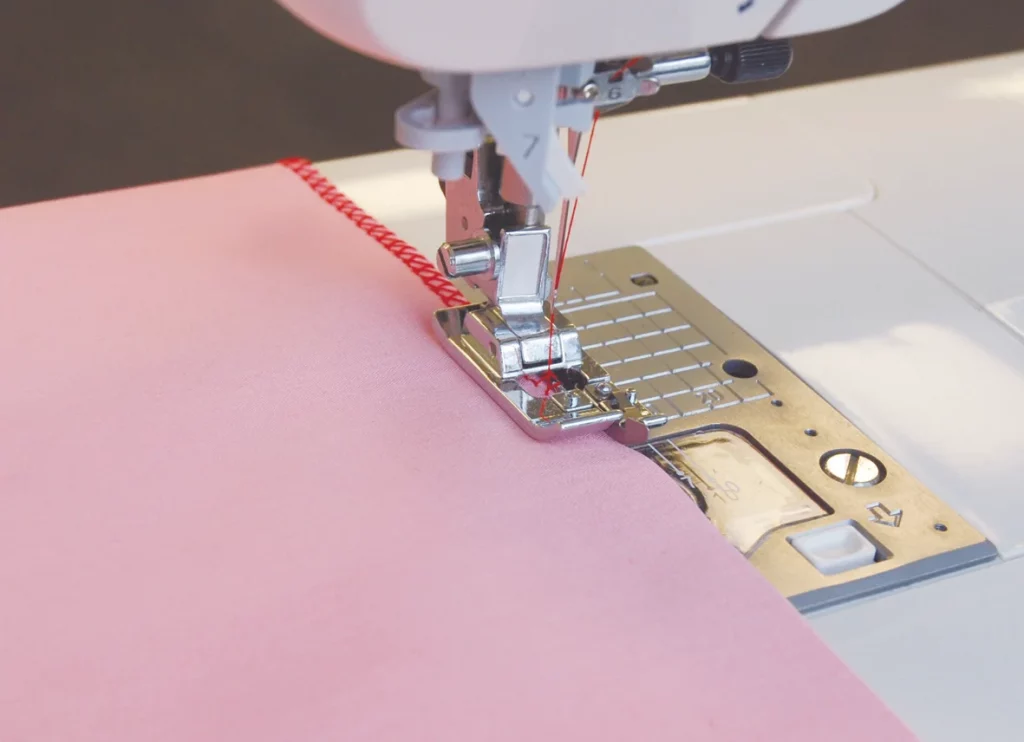
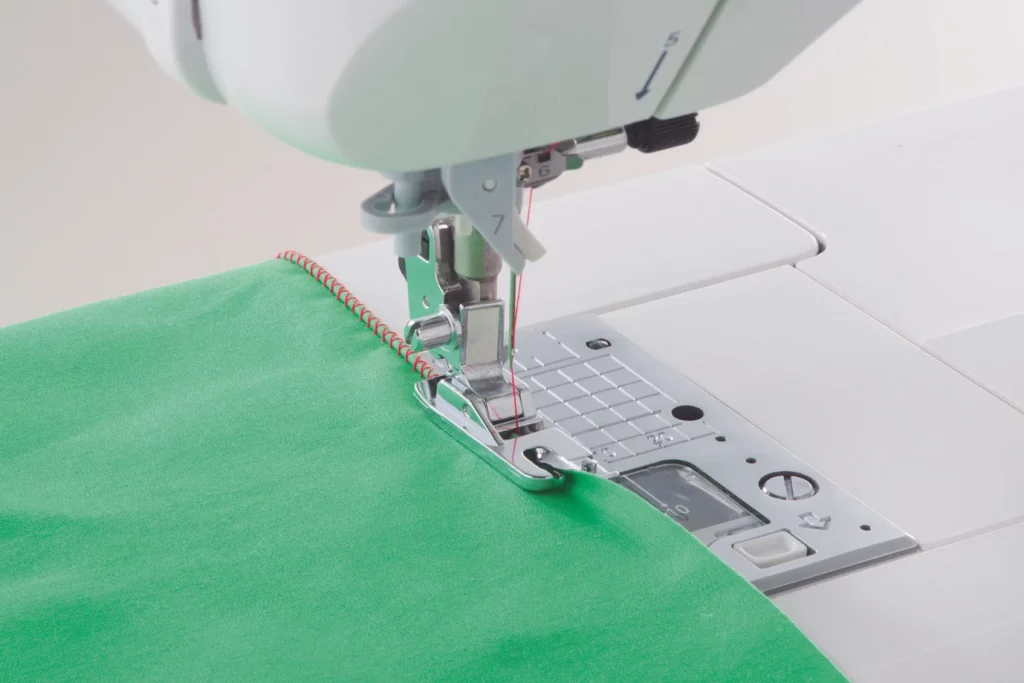
a. Overcast Foot & Overlock Foot
The Dynamic Duo of Edge Finishing
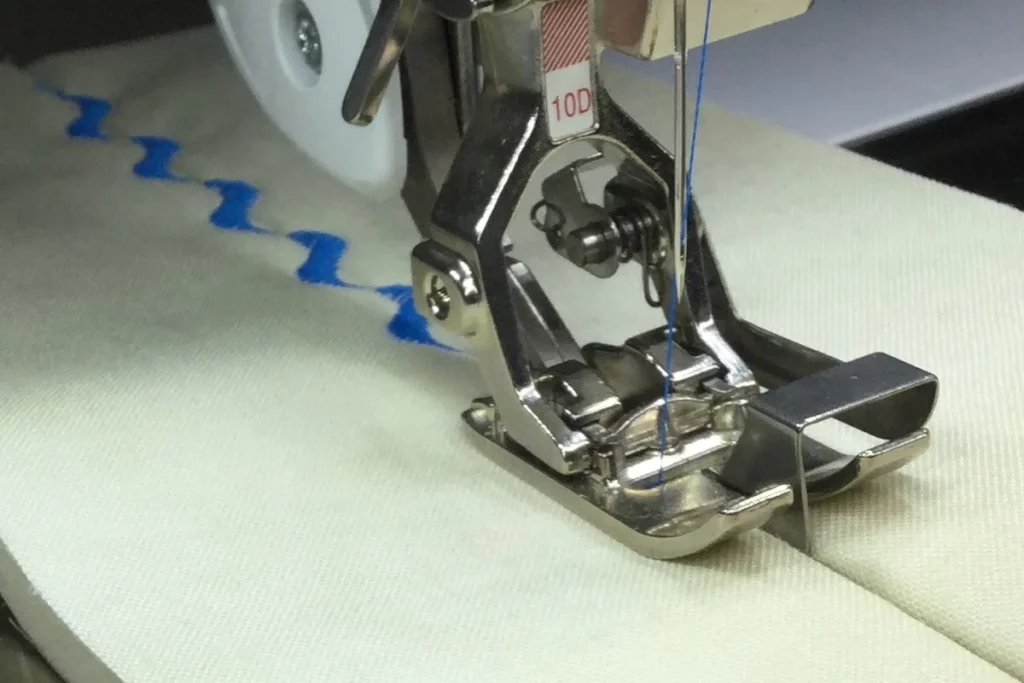
Description:
The world of stitching welcomes two power players when it comes to fabric edges: the Overcast Foot and the Overlock Foot. At a glance, these feet might seem identical, but each carries its unique strengths. While both are designed to prevent fabric edges from fraying, they achieve this with slightly varied techniques and finishes.
Differences and Ideal Scenarios for Use:
- Overcast Foot: This foot is tailor-made for sewing machines that lack the built-in overcasting stitch options. It works by wrapping the thread around the edge of the fabric to prevent fraying. The Overcast Foot is perfect for light to medium-weight fabrics, offering a more relaxed stitch, reminiscent of hand-sewn overcasting.
- Ideal Scenarios: Use with delicate fabrics like chiffon or silk, where a softer edge finish is desired without adding bulk.
- Overlock Foot: A more versatile foot, the Overlock Foot is suitable for both overcasting stitches and adding decorative edgings. It provides a tighter, more professional finish, akin to what you’d see on store-bought apparel.
- Ideal Scenarios: Best for medium to heavyweight fabrics like denim or upholstery materials. It’s also ideal for projects requiring a more polished, commercial look.
b. Zig-Zag Foot
A Multifaceted Marvel in the Sewing World
Description:
The Zig-Zag Foot, often the standard foot on many sewing machines, is an incredibly versatile tool, adaptable to a plethora of stitch types, not just the zig-zag. With its broad needle slot, it allows for movement in various directions, making it an asset for multiple stitch styles.
Common Uses:
- Basic Zig-Zag Stitch: Ideal for finishing raw edges or sewing stretch fabrics.
- Buttonholes: The width of this foot provides ample space for creating buttonholes.
- Decorative Stitches: From scallops to satin stitches, its adaptability shines through.
- Joining Fabrics: Perfect for the classic seam on most fabrics.
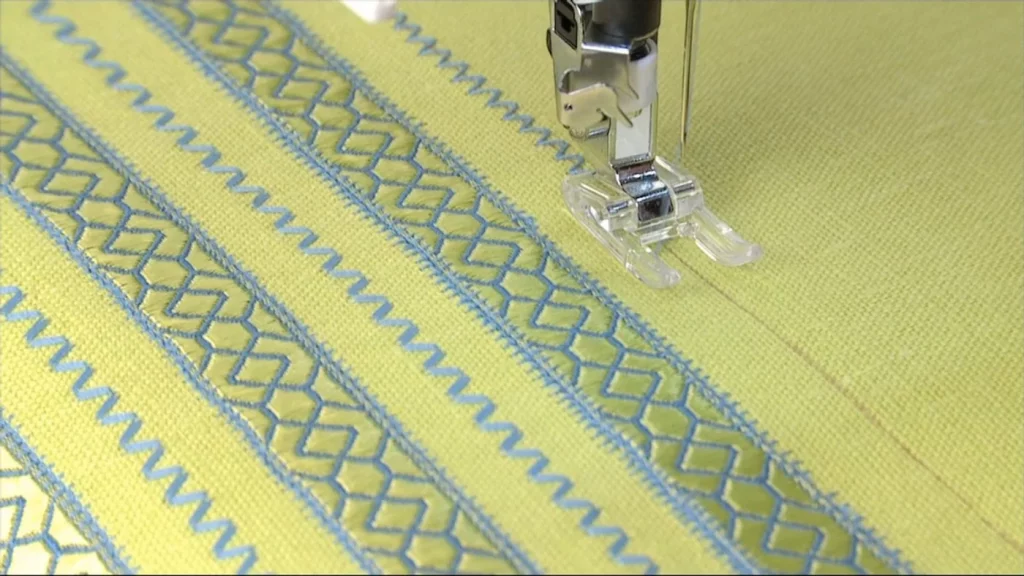
c. Open-toe Foot
An Unobstructed View to Perfect Stitching
Description:
The Open-toe Foot is akin to having a panoramic sunroof on a car—it offers an unobstructed view of your stitching area. Crafted with a clear, open front, this foot allows for precise stitch placement, especially for intricate designs and patterns.
Benefits and Projects:
- Visibility: The primary advantage is the enhanced visibility it offers, allowing users to see precisely where each stitch lands.
- Precision: Especially beneficial for appliqué or decorative topstitching, where precision is paramount.
- Maneuverability: The openness ensures the fabric moves smoothly, particularly beneficial for curves and corners.
Projects Best Suited for Open-Toe Foot:
- Appliqué Designs: It ensures the stitches align perfectly around the edges of the appliqué.
- Embroidery: Ideal for following drawn designs on fabric.
- Monogramming: Provides a clear line of sight for letter placement.
Specialty stitches elevate the craftsmanship of any sewing project. By understanding and deploying the right foot for specific tasks, one can ensure that their project not only looks impeccable but lasts longer too. Whether it’s the polished finish of an overlocked edge or the intricate beauty of an appliqué design, these feet bring precision to the forefront of sewing.
Creating Unique Effects: Advanced Feet
Turning the Ordinary into the Extraordinary with Specialized Tools
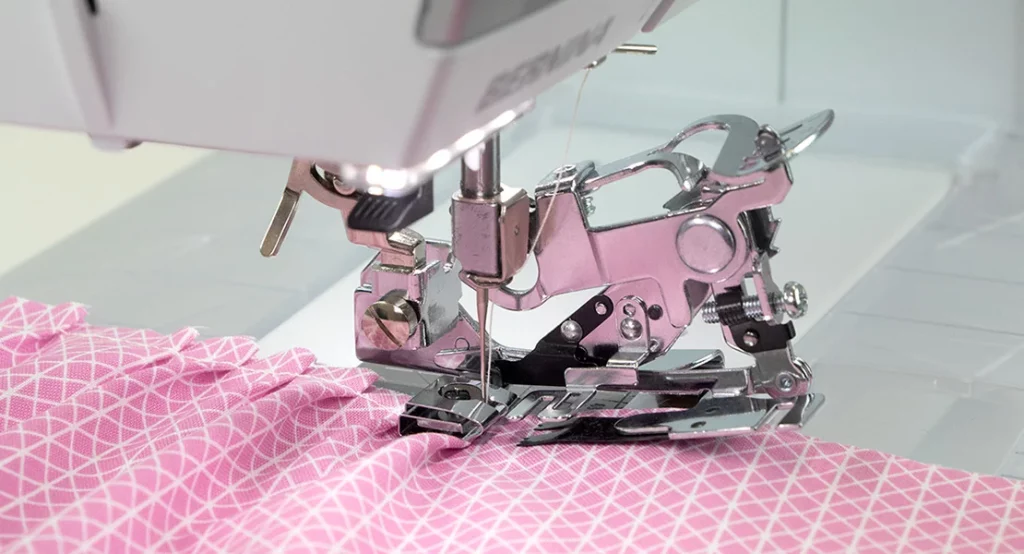
a. Gathering Foot & Ruffler Foot
The Maestros of Pleats and Folds
Description:
Welcome to the realm of texture, where the Gathering Foot and Ruffler Foot reign supreme. These two feet, while serving similar purposes, have nuances that cater to specific needs. Both are designed to create gathers or ruffles in fabric, but the methods and results they offer are distinct.
Differences and Techniques:
- Gathering Foot: This foot is designed to elegantly gather light to medium-weight fabrics. By controlling the stitch length and tension, one can adjust the fullness of the gather.
- Techniques: For a softer gather, opt for a longer stitch length and standard tension. To achieve fuller gathers, reduce stitch length and increase the tension slightly.
- Ruffler Foot: Think of the Ruffler Foot as the advanced cousin of the Gathering Foot. It provides more control over the depth and frequency of pleats, making it versatile for various projects.
- Techniques: The adjustment settings on the foot determine the depth and frequency of the ruffles. For fewer ruffles, adjust to a higher setting. If you desire a flamboyant flair with more frequent ruffles, dial down to a lower setting.
b. Rolled Hem Foot & Narrow Rolled Hem Foot
Creating Flawless, Delicate Finishes
Description:
When it comes to sewing sheer and lightweight fabrics, a rolled hem is often the finish of choice. Both the Rolled Hem Foot and its narrower counterpart cater to this need, creating delicate, professional-looking hems effortlessly.
Tips for Perfect Rolled Hems:
- Starting the Hem: Begin by folding the fabric’s edge (about 2cm) twice, forming a tiny hem. Hold this in place and sew a few stitches, after which the foot will continue the roll for you.
- Fabric Feed: Ensure the fabric edge feeds into the curl of the foot. This may require gentle guidance, especially around curves.
- Stitch Length: A shorter stitch length yields a neater finish. Adjust accordingly based on fabric type.
- Practice Makes Perfect: Always test on scrap fabric to fine-tune tension and stitch settings. Remember, the Narrow Rolled Hem Foot is ideal for tighter spaces and more delicate fabrics, while the regular Rolled Hem Foot works best for broader hems.
c. Edge Stitch Foot
Precision Personified for Impeccable Borders
Description:
The Edge Stitch Foot is a revelation for those who crave precision. With its distinct guide in the center, this foot ensures stitches are impeccably placed close to the edges, seams, or folds of the fabric.
Perfecting Edges:
- Positioning: For perfect edge stitching, align the fabric edge or seam with the guide in the center of the foot. This ensures the needle drops just where you want it.
- Stitch Type: While a straight stitch is the most common choice, decorative stitches can also be used to add flair to the project.
- Tension and Length: Regular tension and a medium stitch length usually offer the best results. However, adjustments may be needed based on fabric type and weight.
- Versatility: Beyond edge stitching, this foot is great for attaching lace, braids, or tucks. The key lies in maintaining alignment with the foot’s center guide.
Embarking on a sewing project is akin to painting on a blank canvas. The fabric serves as the canvas, the thread as the paint, and these advanced sewing feet as the brushes. By mastering the tools at your disposal, you’re equipped to create unparalleled masterpieces, transforming simple fabrics into exquisite art.
Crafting Excellence: The Symphony of Sewing Feet
In the diverse landscape of sewing, the subtleties and intricacies involved in choosing the right tool can often dictate the difference between mediocrity and mastery. Each sewing foot, a humble yet pivotal accessory, carries with it a world of potential, holding the keys to unlock unique textures, designs, and finishes.
Unlocking Potential with Purposeful Choices
The realm of sewing isn’t just about joining pieces of fabric together. It’s about giving life to creations, ensuring that every fold speaks, every stitch sings, and every hem harmonizes. This resonance is achieved only when the right foot meets the right project.
Imagine crafting a sleek, contemporary dress and realizing the hems aren’t precise. Or envisioning a ruffled, vintage blouse only to find the gathers lack volume. Such discrepancies are not always the result of flawed techniques but rather mismatched tools. As we’ve journeyed through the wide array of sewing feet, it becomes evident that each foot, be it the Edge Stitch Foot or the Ruffler, serves a unique purpose, complementing specific fabric types, designs, and sewing intentions.
Daring to Explore: The Adventure Awaits
While it’s paramount to understand the fundamental purpose of each sewing foot, there’s an uncharted territory waiting to be discovered: experimentation. Every seasoned tailor or passionate hobbyist knows that some of the most magnificent creations spring from moments of daring experimentation.
Perhaps the Zig-Zag Foot, typically reserved for standard stitches, could be employed in a unique decorative endeavor? Or the Binder Foot, commonly used for attaching bias tape, might find its way into a novel quilting project? The possibilities are only as limited as one’s imagination.
Stepping out of the comfort zone and trying a foot in a non-traditional way might just lead to a groundbreaking technique, a signature style, or an avant-garde design. The world of sewing feet is an open canvas, inviting every artist to splash their distinct color.
Sewing: A Continuous Journey of Discovery
The sewing journey is one of endless learning. And while techniques, designs, and fabrics play pivotal roles, the unsung heroes are undoubtedly the sewing feet. They’re the silent partners, ensuring precision, facilitating creativity, and transforming visions into tangible masterpieces.
To every sewing enthusiast out there, whether you’re a budding beginner or a seasoned expert, remember this: every project you undertake is an opportunity to weave magic. Every stitch, a testament to your dedication. And every foot you employ, a bridge connecting your vision to reality.
As we wrap up this exploration into the world of sewing feet, take a moment to appreciate the arsenal at your disposal. Understand them, experiment with them, and most importantly, celebrate them. Because, in the symphony of sewing, it’s these feet that ensure every note hits just right.
Expert’s Corner: Journeying through the Stitches with Mitch Thompson
Embarking on a Textile Odyssey
Sewing, for many, is a skill or a hobby. For me, it’s an eternal journey. A journey where every project is a destination, every fabric a terrain, and every sewing foot a trusted companion guiding me through.
Stitches in Time: Memorable Projects and their Trusty Feet
1. The Vintage Gown Saga
I remember when I took on the ambitious task of replicating a 1920s flapper dress. Delicate, intricate, and resplendent, the original piece was a work of art. The Rolled Hem Foot became my go-to for the sleek, tiny hems on the cascading layers. The outcome? A masterpiece that blended history with contemporary craftsmanship.
2. The Quilted Dreamscape
A patchwork quilt for a dear friend’s newborn. Not just any quilt, but a tapestry of memories, stories, and dreams. Here, the Walking Foot was indispensable, ensuring smooth and even layers, while the Quarter Inch Foot was a savior for precise seams. The quilt remains a cherished possession in their household.
3. The Denim Revolution
Reinventing a classic pair of jeans was a challenge I accepted gleefully. Adding embroidered patterns, fringes, and a touch of boho charm required versatility. The robust Zig-Zag Foot was perfect for the thick denim stitches, while the Open-toe Foot ensured perfect embroidery alignment. Those jeans? They’re touring fashion ramps as we speak.
Preserving the Feet: Maintenance Matters
A painter cares for his brushes, a writer for his pens, and we sewists? We ought to care for our sewing feet. Here are some nuggets of wisdom I’ve gathered over the years:
- Regular Cleaning: Dust and lint are the bane of sewing machines. Regularly use a soft brush or compressed air to clean the feet. Keep them lint-free, and they’ll serve you long.
- Storage Smarts: When not in use, store your feet in a dedicated case or box. This not only prevents damage but also ensures you can find the right foot when inspiration strikes.
- Inspection and Replacement: Sewing feet don’t last forever. Periodically inspect them for wear and tear. Bent or damaged feet can affect stitch quality.
- Lubrication: Some sewing feet, especially metal ones, benefit from occasional light lubrication. A tiny drop of sewing machine oil does the trick.
- Know Your Feet: Every sewing foot has its unique cleaning and maintenance needs. Be sure to read any manufacturer instructions or guidelines.
To all the sewists reading this: the world of sewing is vast, vibrant, and ever-evolving. While techniques and trends come and go, the fundamentals remain. Our tools, especially our sewing feet, are the unsung heroes in our textile tales. Cherish them, care for them, and they will ensure every stitch, every seam, and every design echoes perfection.